Kali Linux on VirtualBox
Today I will be showing you how to install Kali Linux on VirtualBox.
The reason we are installing Kali Linux is that it comes fully loaded with tonnes of security software and tools without us having to install them individually. Other security distributions are ParrotOS and BlackArch. Each of the distros is built on a different version of Linux. Kali is built atop of Ubuntu, ParrotOS on Debian and BlackArch on Arch Linux. I implore you to try each of these operating systems and see which one suits you best.
There are different ways we can go about installing Kali Linux, one is with an installer image (iso) file or with an open virtualization archive format file (ova). I will be showing you how to install both with the ova installation being very easy and good for beginners but comes with limited initial install options that can all be changed later. The iso file is the one that I use with my Kali machine, as it’s more of a fresh install then the ova installation. Feel free to skip over either section depending on which way you want to install Kali.
Kali Linux OVA Install
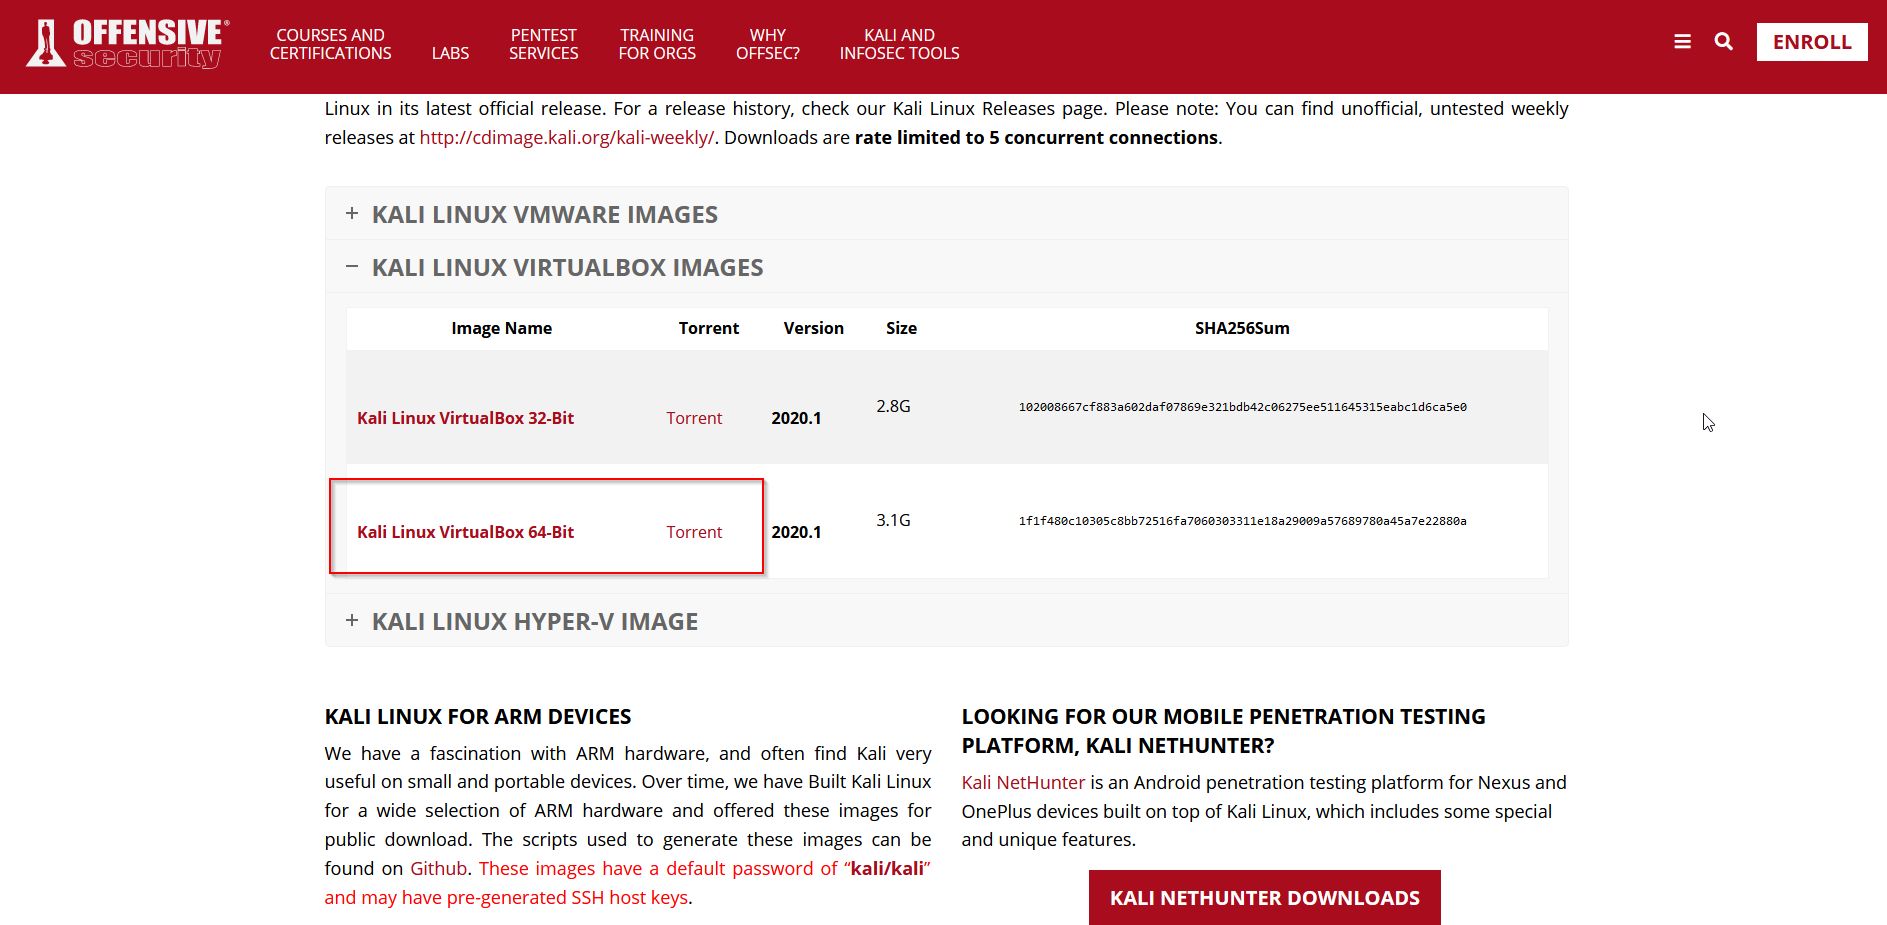
To begin with the installation, we need to head over to the downloads page and grab the Kali VirtualBox image file. https://www.offensive-security.com/kali-linux-vm-vmware-virtualbox-image-download/#1572305786534-030ce714-cc3b
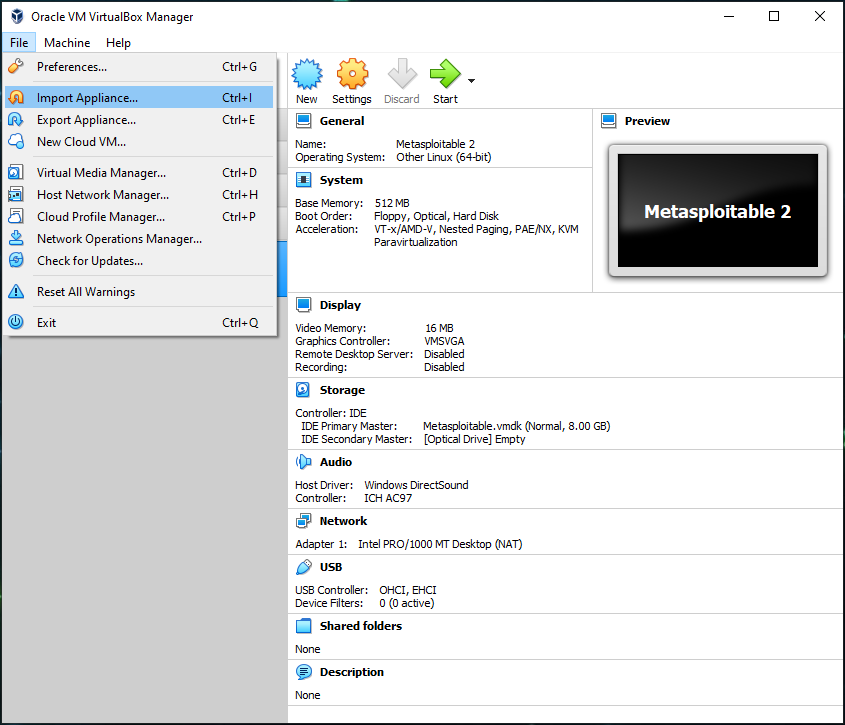
Once the file has downloaded we can now open VirtualBox, hit the file button and select Import Appliance.
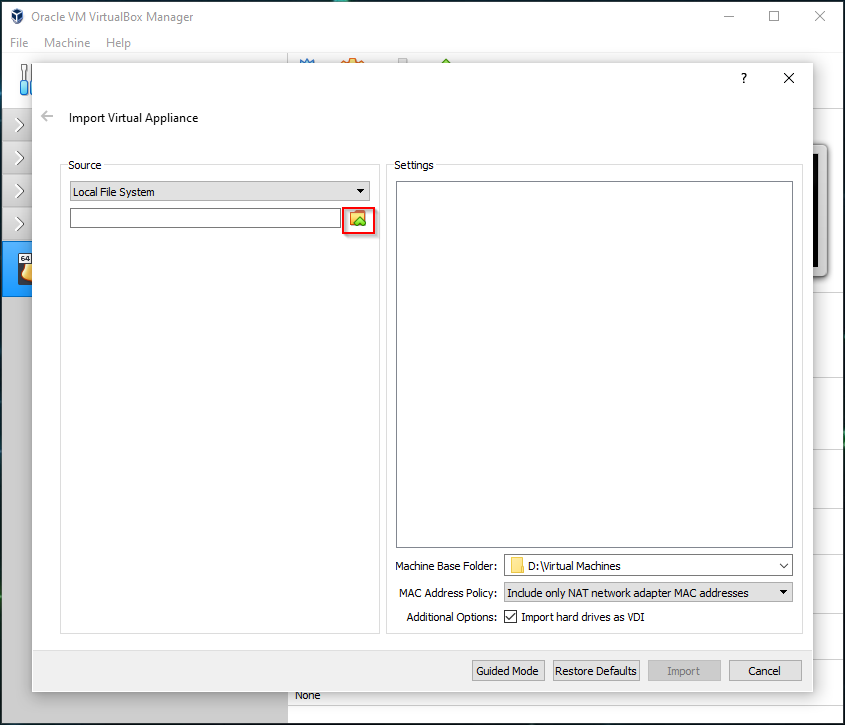
Now we can click on the folder icon and search for where the Kali virtual machine downloaded.
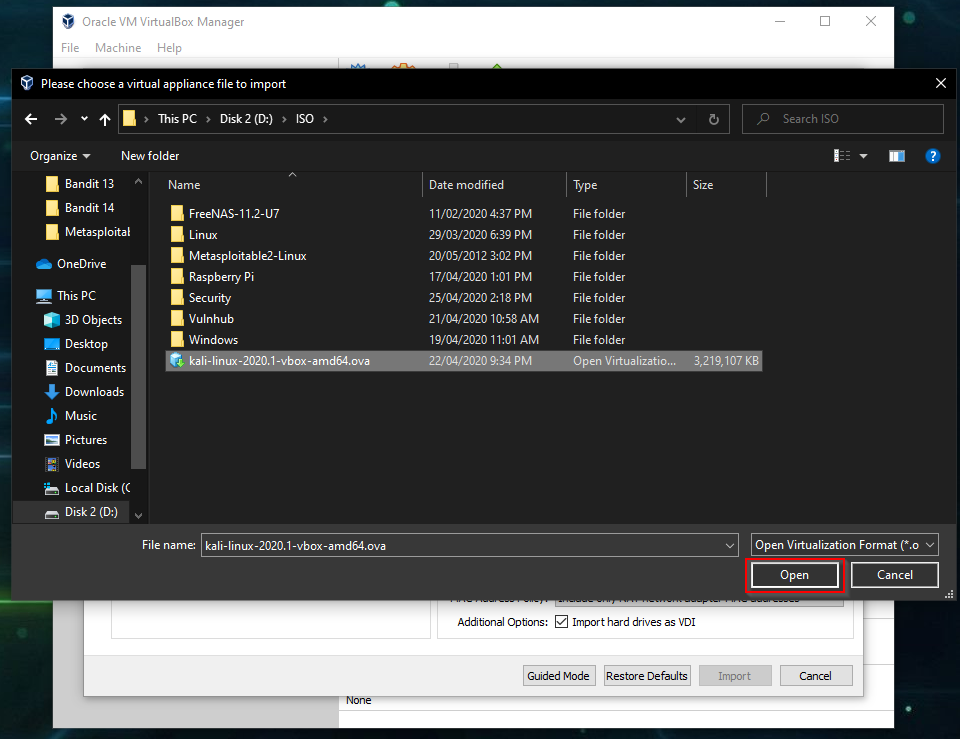
Once you have found where the file was downloaded too, we can select the Kali Linux .ova file and click open.
Now It loads the virtual machine settings into the window of which we can change to what we want. Most of the time, 2GB of RAM is enough but I will change mine to 4GB to give it more space to open multiple applications.
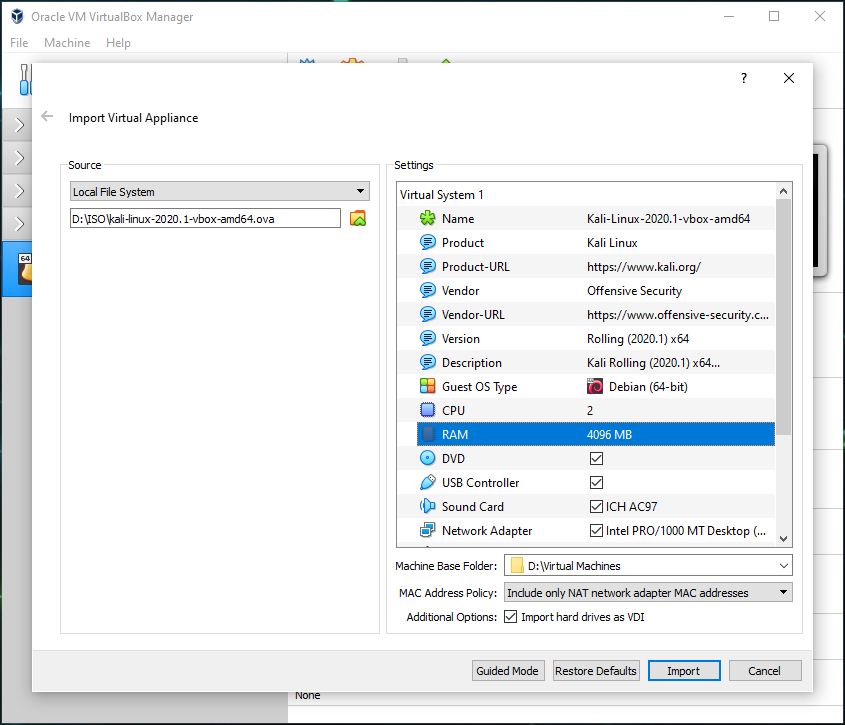
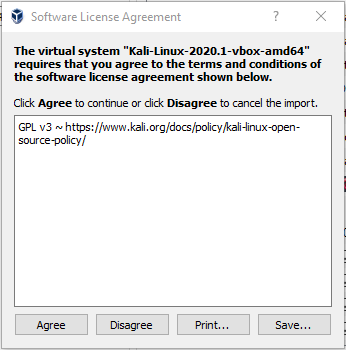
Once you are done with the settings, we can click on the import button which will bring up a software license agreement which we can hit agree.
VirtualBox will then take some time importing the Kali virtual machine, ready for us to use.
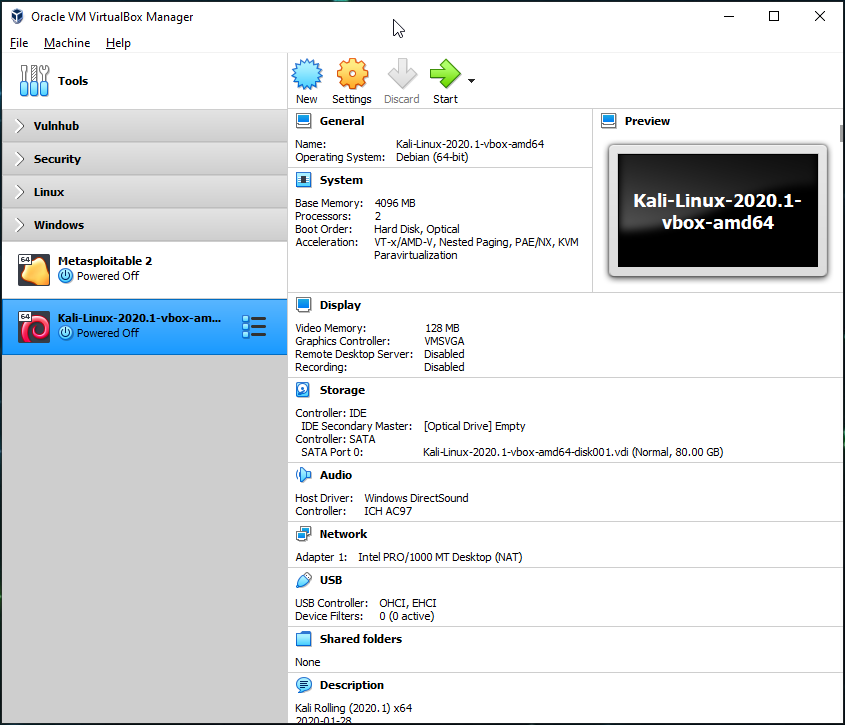
And we are done. Kali Linux is now installed onto your computer ready for you to do some hacking. Just a heads up, but when you first open Kali, the default username and password is ‘kali’/’kali’ of which you should change the default password to increase your security.
Kali Linux iso Install
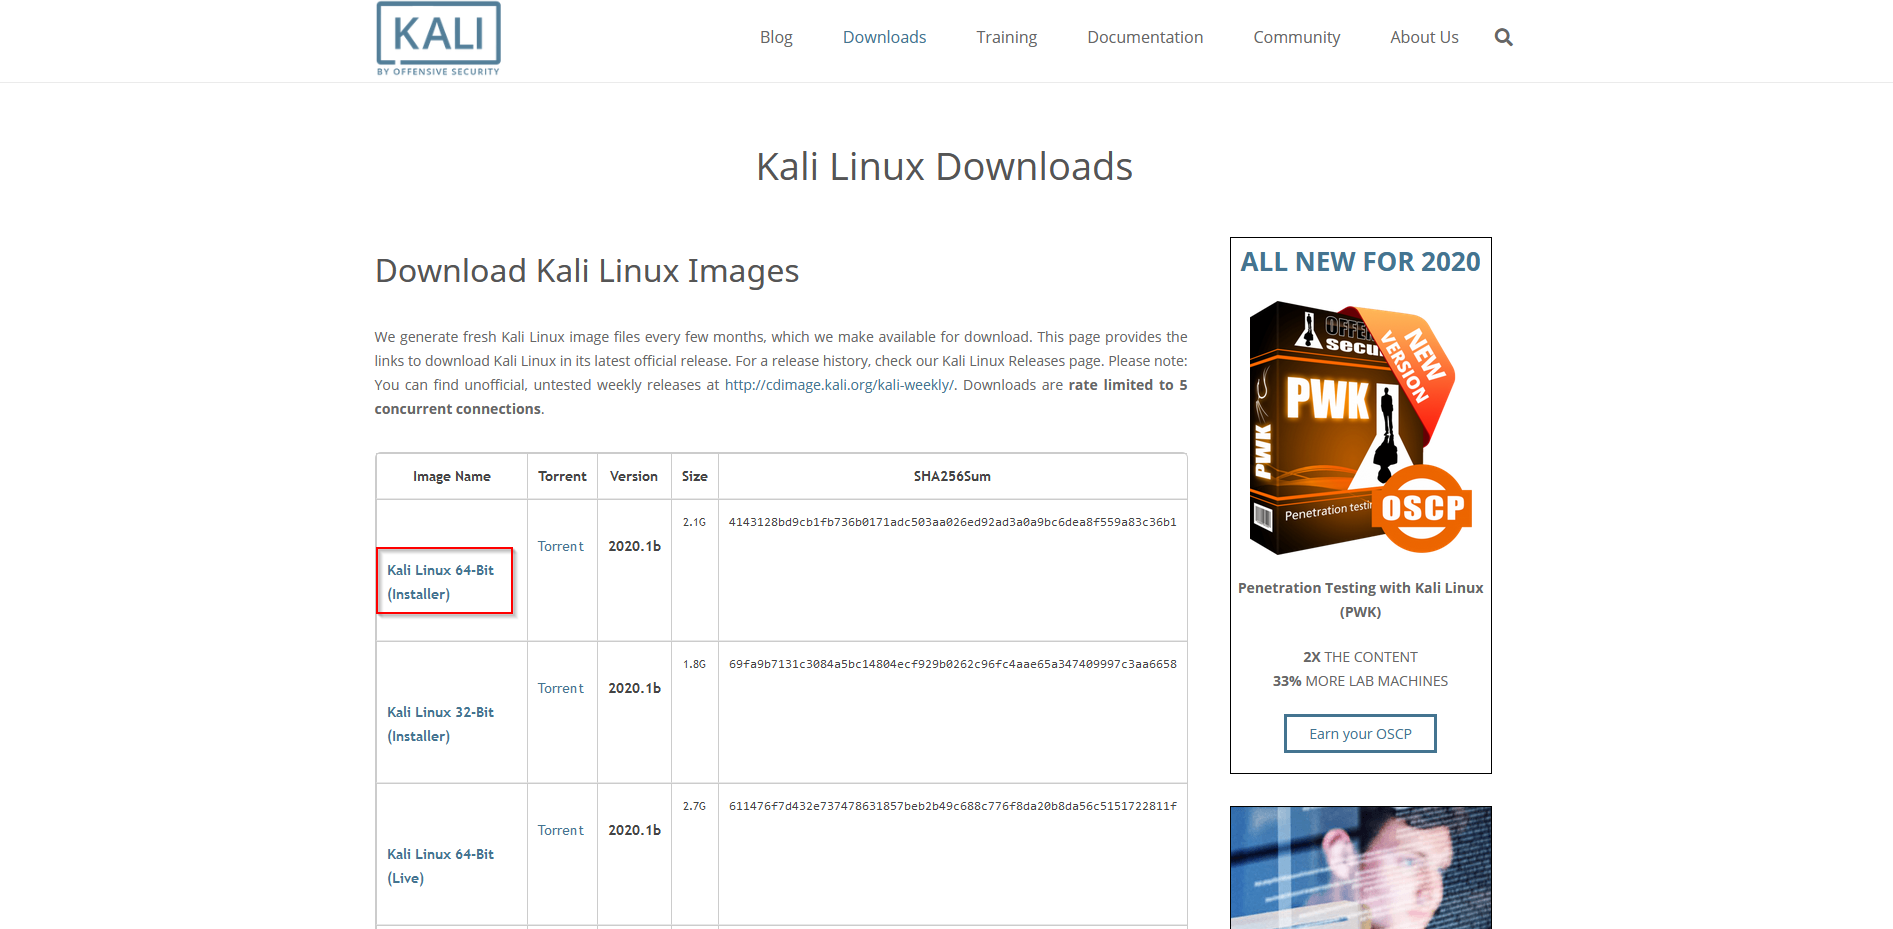
To begin with the installation, we need to head over to the Kali Linux home page and download Kali Linux. We will be using the 64-bit version of Kali. https://www.kali.org/downloads/
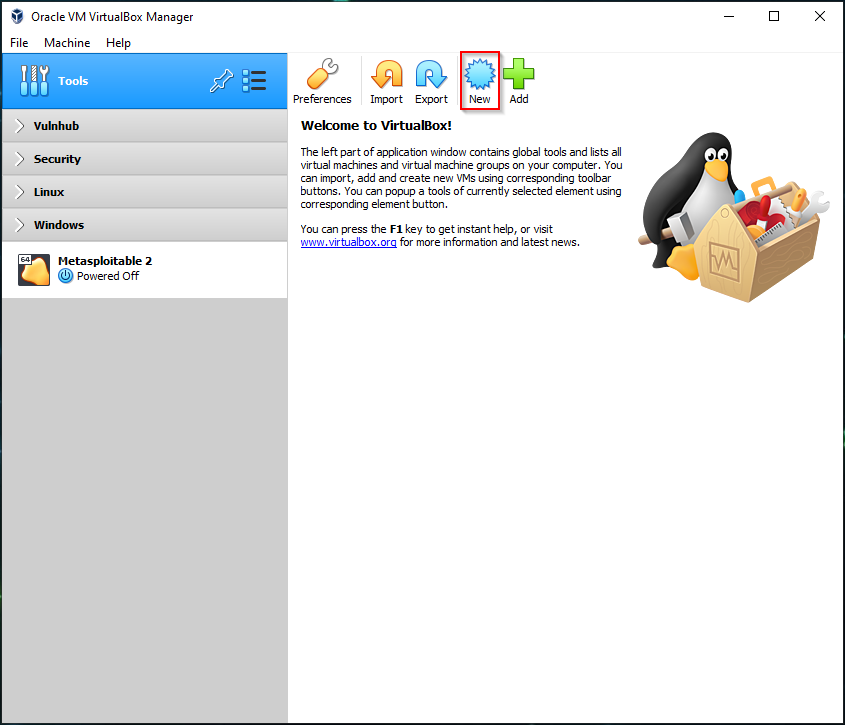
Once the installer has finished downloading, we can start up VirtualBox and press the new button to create a new Kali Linux virtual machine.
When the installation screen pops up, we will give our virtual machine a name called Kali Linux. Change the type to Linux and the version to Ubuntu(64-bit). As I explained at the top, that’s because Kali is built on top of Ubuntu infrastructure. We can now hit the next button to proceed.

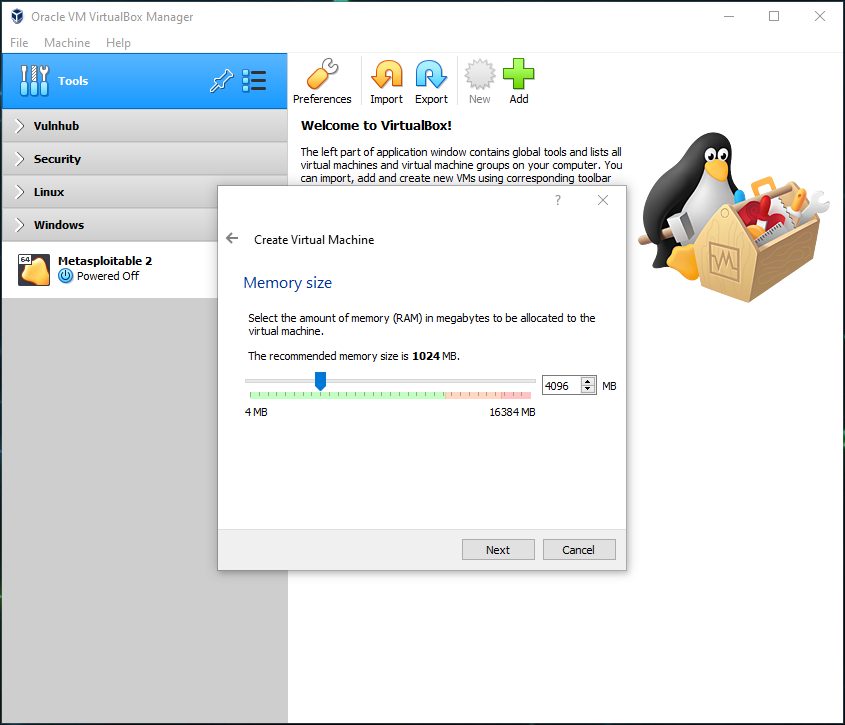
For the memory size, we will be setting it to 4096MB or 4GB, both are the same thing just in different units. We can then hit the next button.
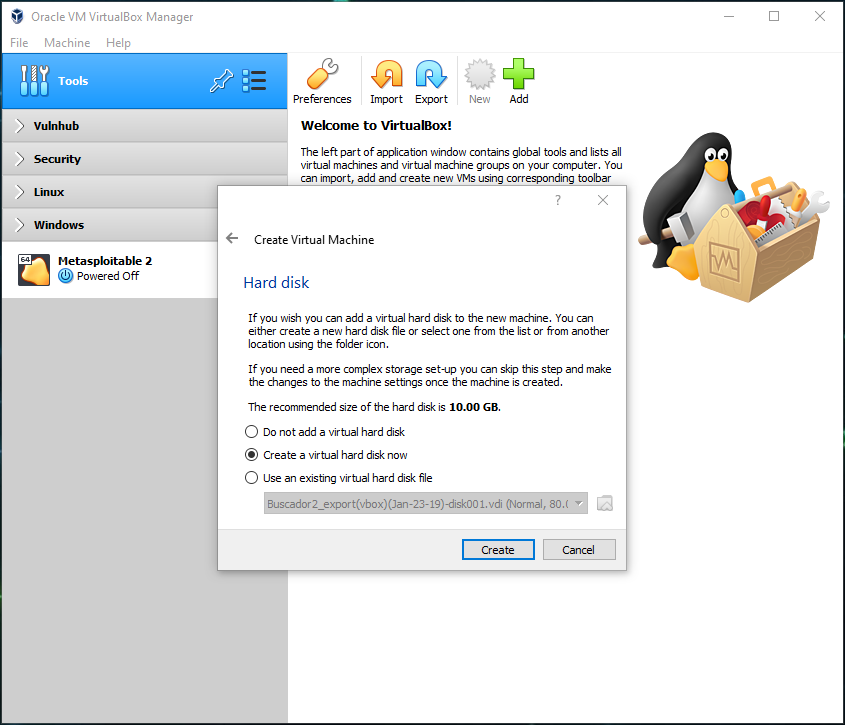
We will now be choosing to create a new hard disk and click create to proceed.
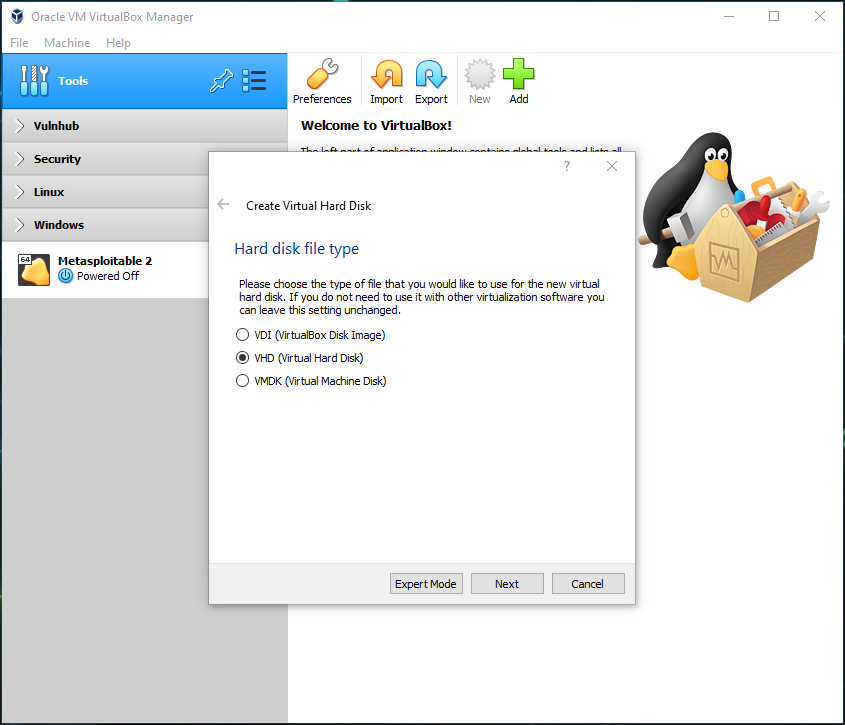
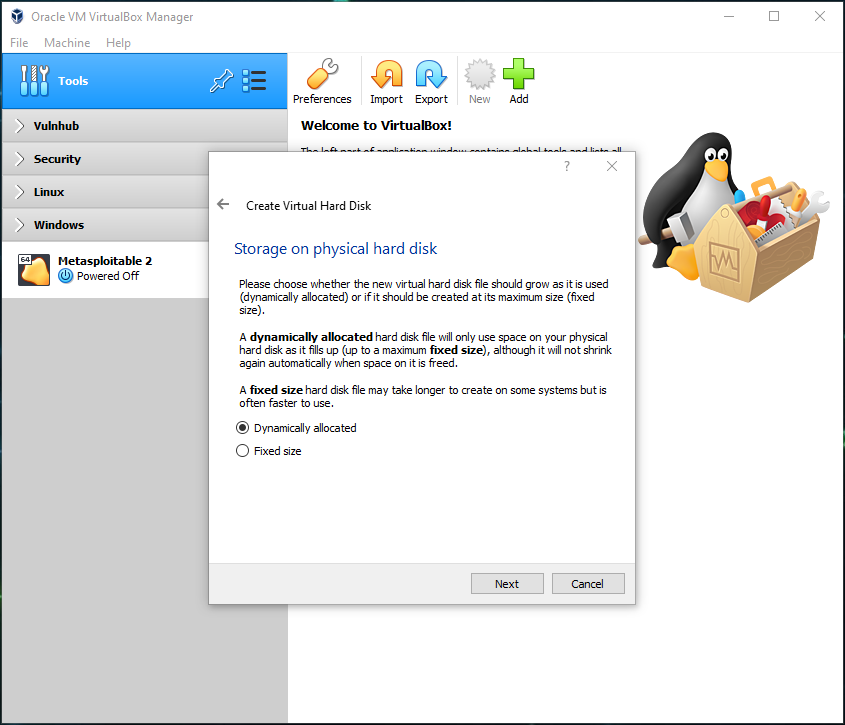
There will be 3 options shown on screen. It doesn’t really matter which type of disk you choose but I prefer to choose the VHD file. We can click the next button once we have made our choice.
We are now presented with 2 options and some information explaining them. I will be choosing dynamically allocated as this allows our Kali virtual machine to not use up too much of our disk space at first and I haven’t noticed any performance issues compared to a fixed size hard disk. Click on the next button to proceed.
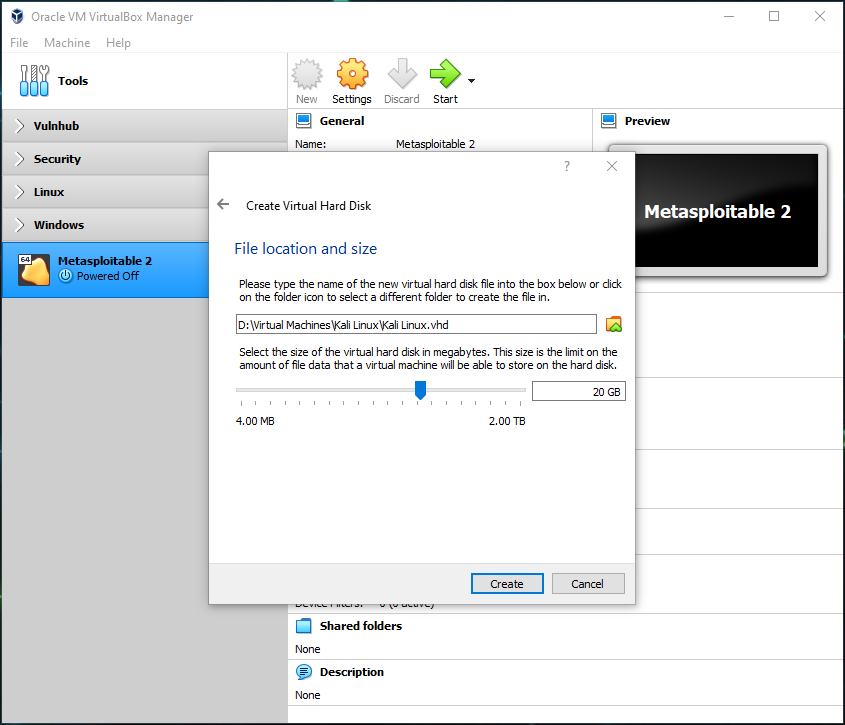
We are now going to change the default size and make the limit of the hard disk size as 20GB but keeping the location the default one. Clicking on the create button to finish the creation of the virtual machine.
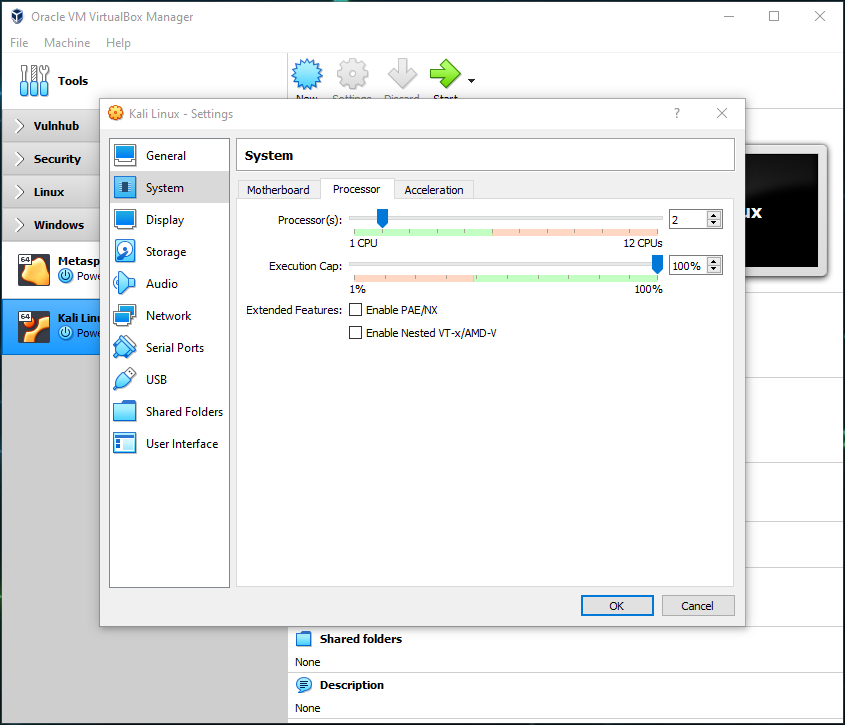
Now before we start running the virtual machine we have to change some of the settings. So click on the Kali Linux option on the left and hit the settings button.

First, we navigate to System > Process and change the number of processors to 2.
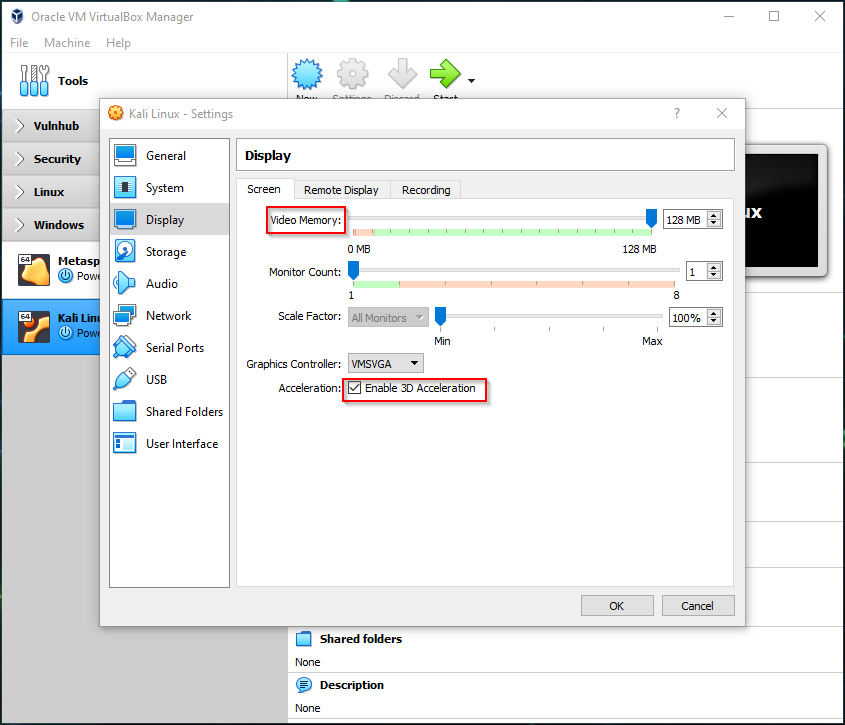
Then we go to the Display settings and change the video memory all the way up to 128MB and tick the checkbox that says Enable 3D Acceleration.
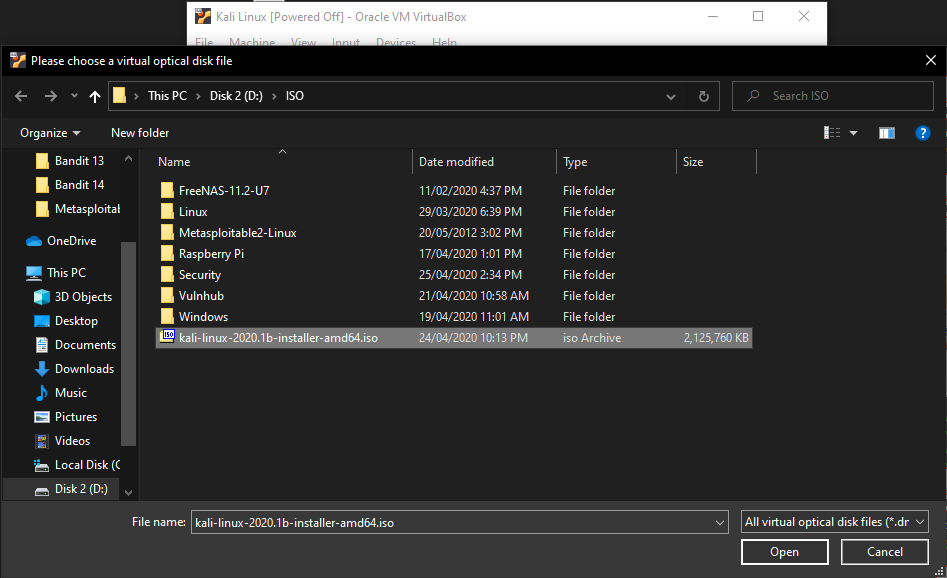
Now we can click the OK button and double click on the Kali Linux machine to start it up. A new VirtualBox application will open and that’s what our Kali Linux virtual machine will be running in. But when we open it, a popup opens and says we need to select a start up disk. This will be the Kali Linux iso file that we downloaded earlier. So we need to click on the folder icon and then the add button which will open file explorer and we can navigate to where our iso file downloaded.
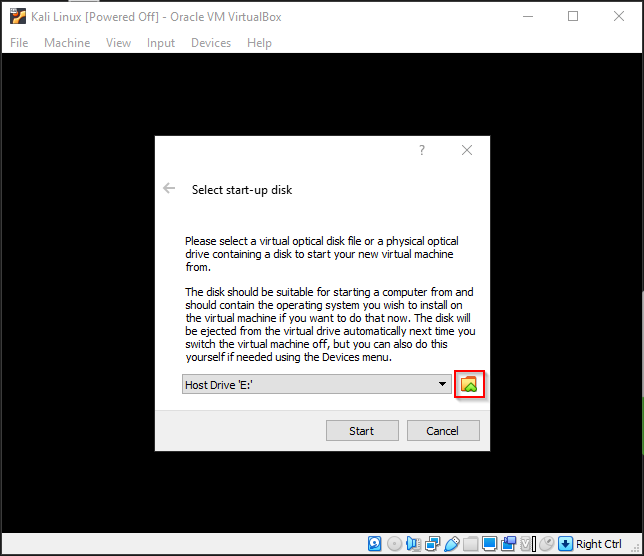
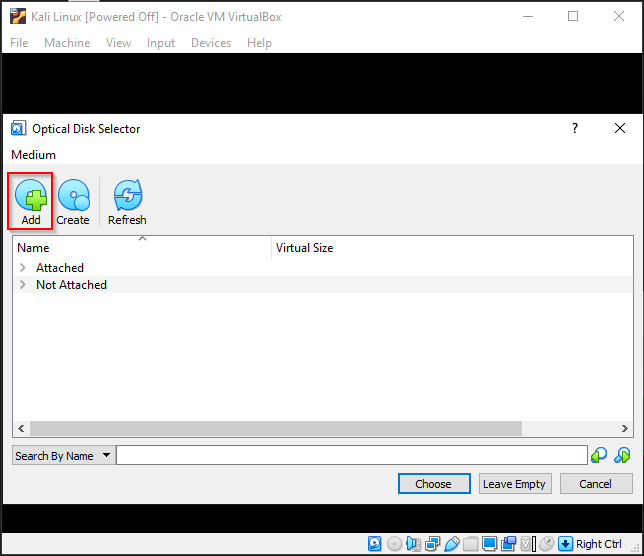
We can then select our downloaded iso file and click open and then the choose button.
Your screen should now look something like this.
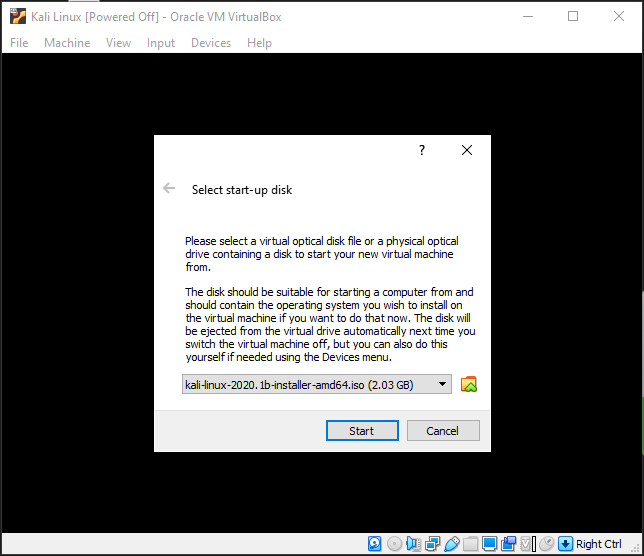
We can now press start which will boot up our installer file.
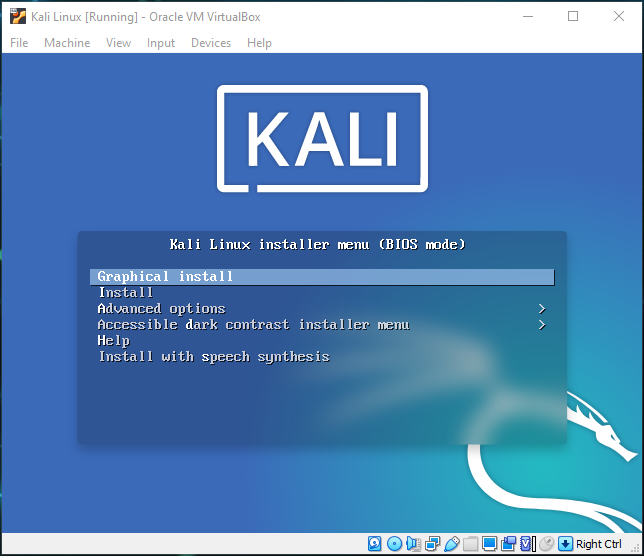
This boot screen should come up and we can either select the Graphical install or Install options. I am going to go ahead and select the Graphical install option which makes it easier to control what’s going on. Click enter to select the right option. The machine then takes a second to load before starting the graphical install process.
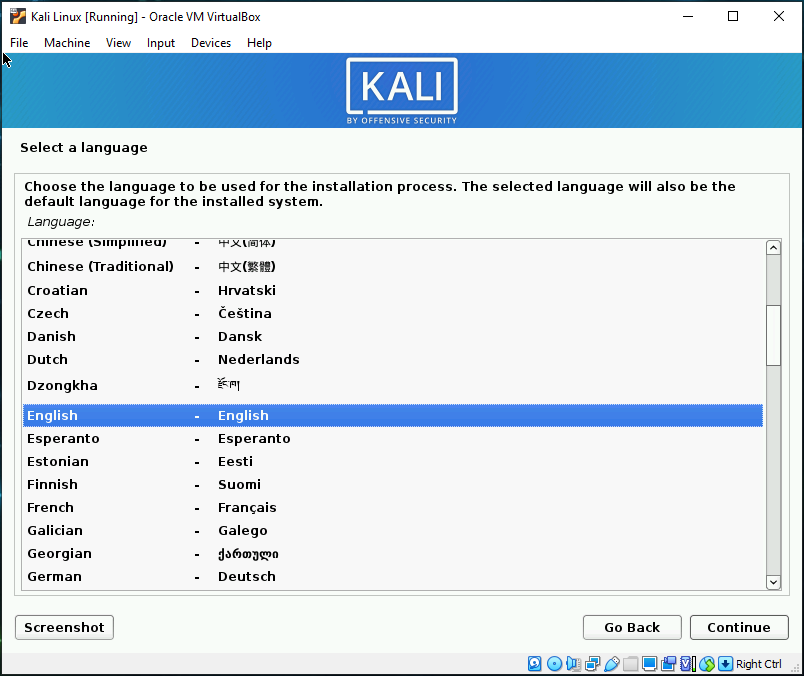
Selecting the language will also make it the default language for the operating system so I will be selecting English. Feel free to choose any language that you speak and read comfortably.
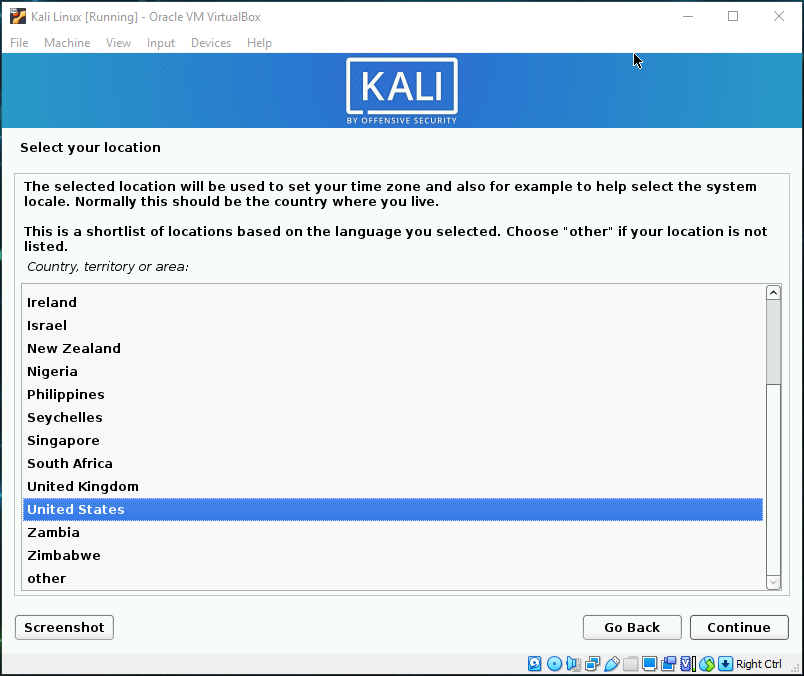
Now we can select what country we live in for our time zone information. I live in Australia so that’s what I am going to select. But select whatever country you live in or want to live in. The only thing this effects is the time displayed in Kali.

Now we select the type of keyboard we are using. Most of the time, this will be whatever country you live in. You can google what keymap your country uses if you are unsure but mine is the American English keymap. Once you hit continue, Kali will take a minute or so to install some components. Please be patient as this may take some time. Once this has completed a couple of steps, it asks us for a hostname for this system.
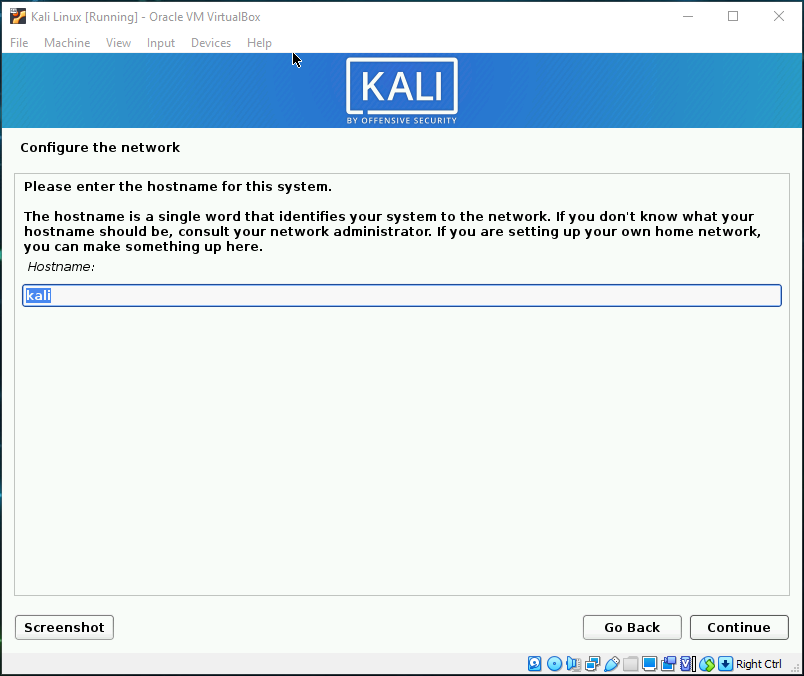
I just leave this as is but you can change it to whatever you want. HackingMachine1000 if you really want to. Click next to proceed.
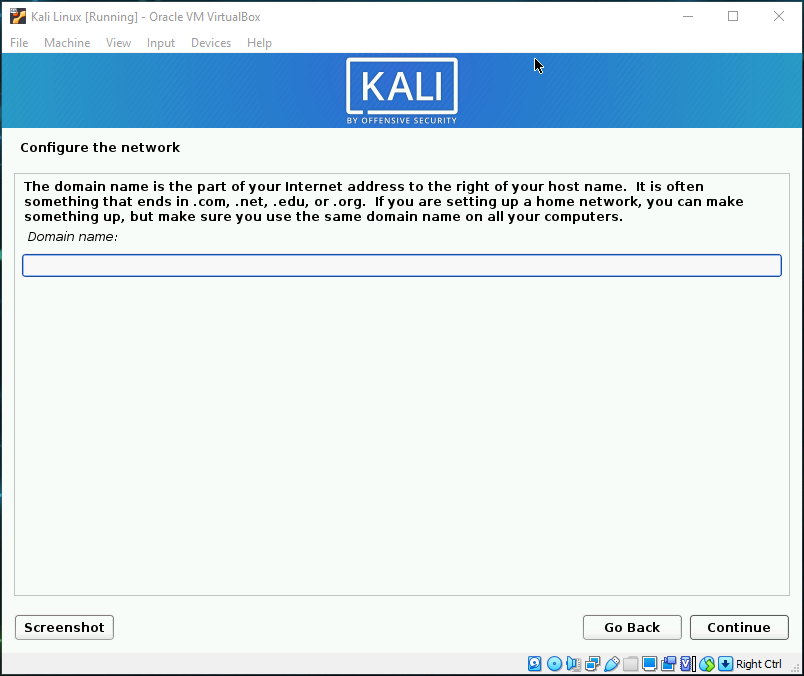
For the domain name, we can just leave this blank and click continue.
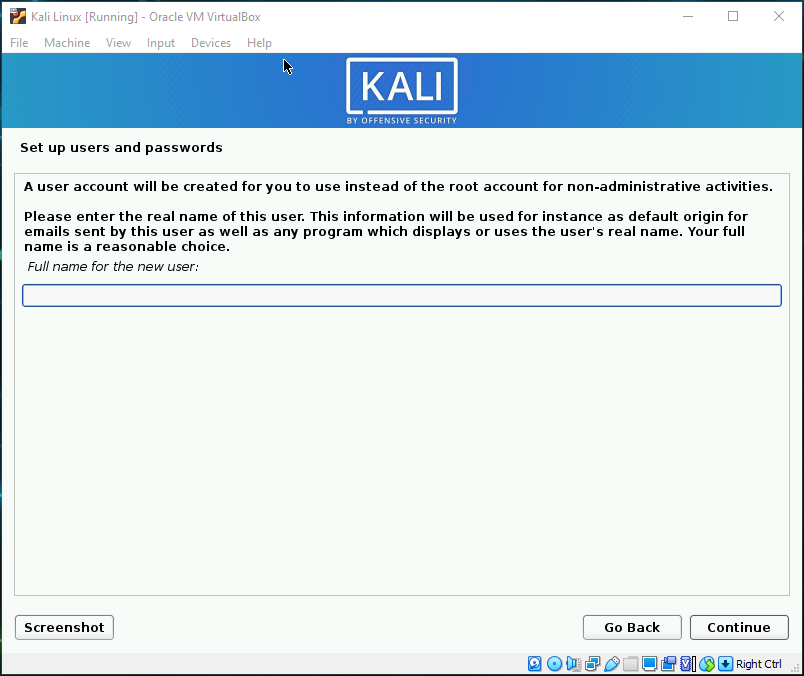
We are now asked to create a new user. Enter the name of the user. Note that this is not the username of the account. So for full name, I am going to be entering henchm4n and you don’t have to use your real name if you don’t want too.
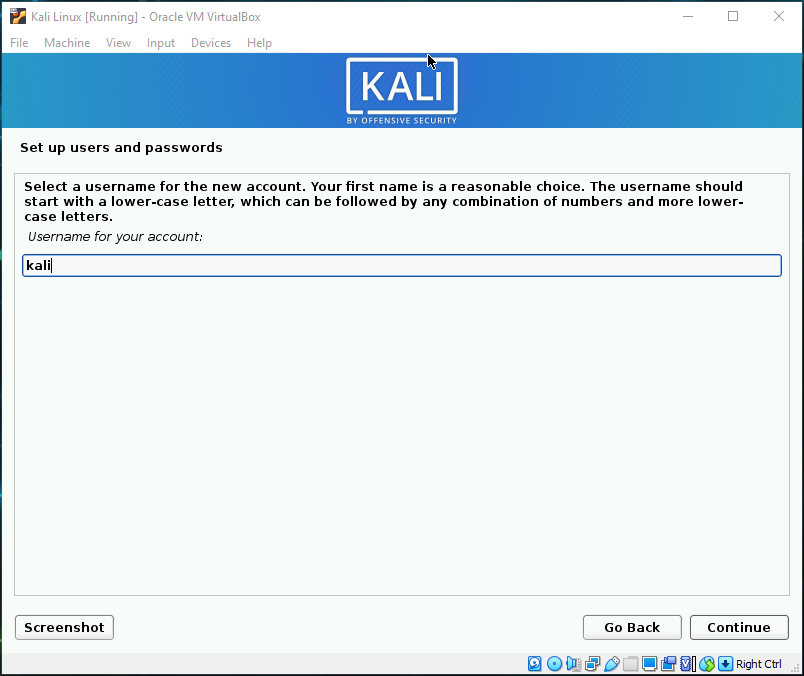
For username I am going to name the user kali.
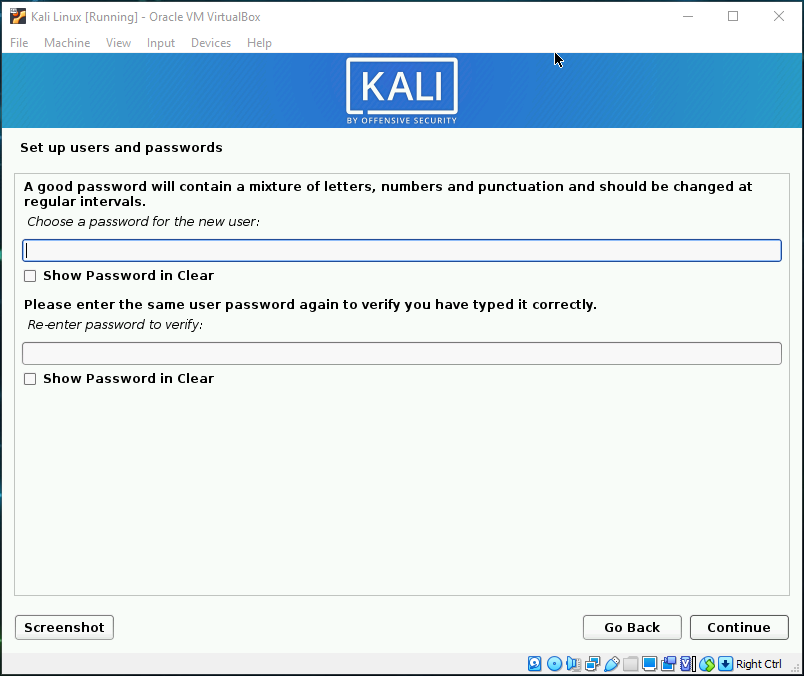
And I am going to make sure I use a strong password. The next option is related to configuring Kali’s local time and entirely dependent on what region you live in. I won’t be showing you what option I chose but choose the next option for where you live or where you want Kali to think you live.
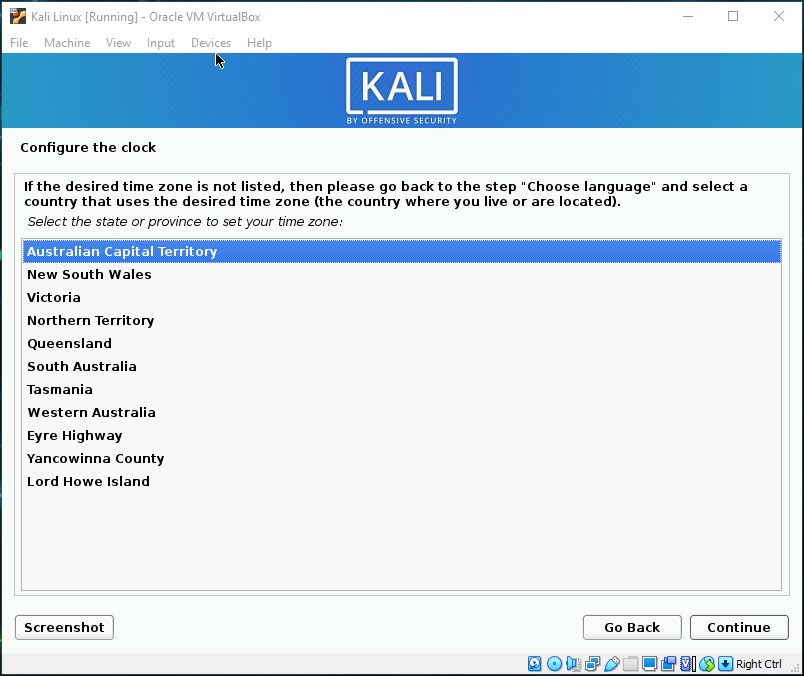
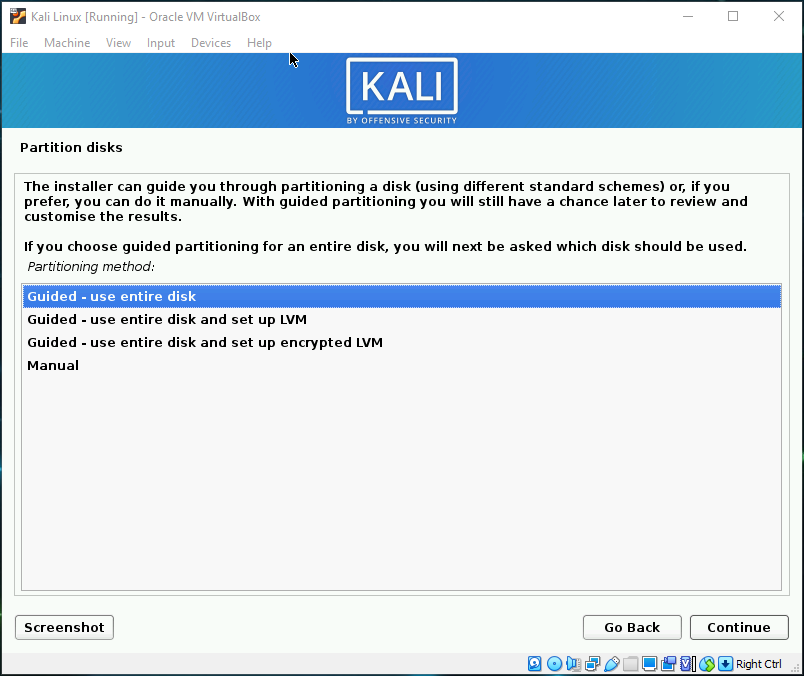
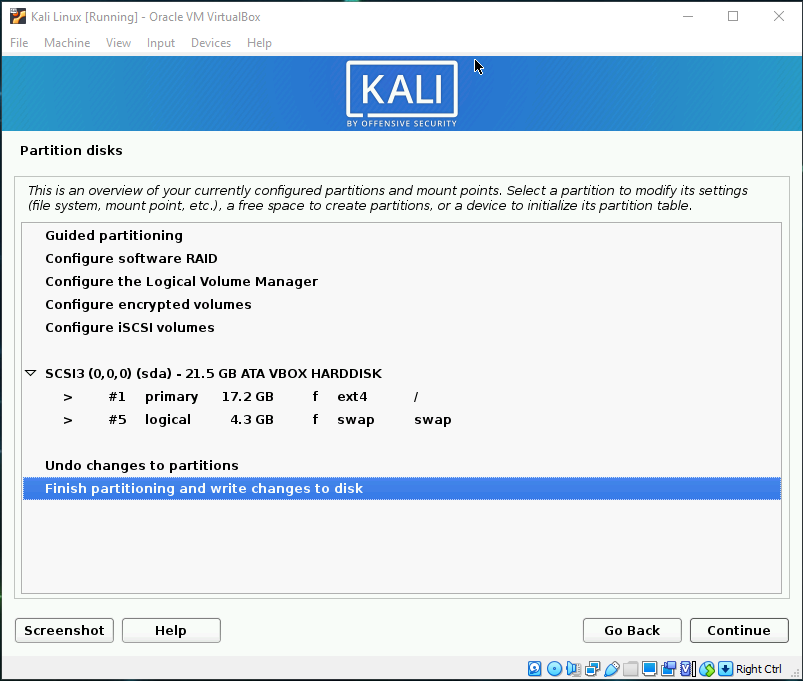
Now we are given the options on how we want to partition our Kali disk. I will just be selecting the top option and not show you how you can encrypt your files as it is a bit advanced for this tutorial. So click continue with the top option selected.
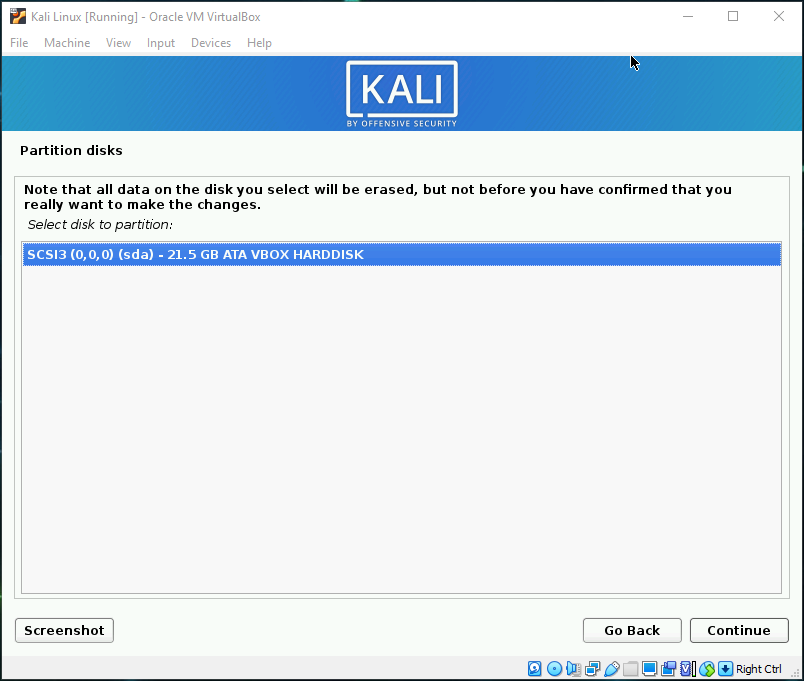
Click continue on the only option shown.
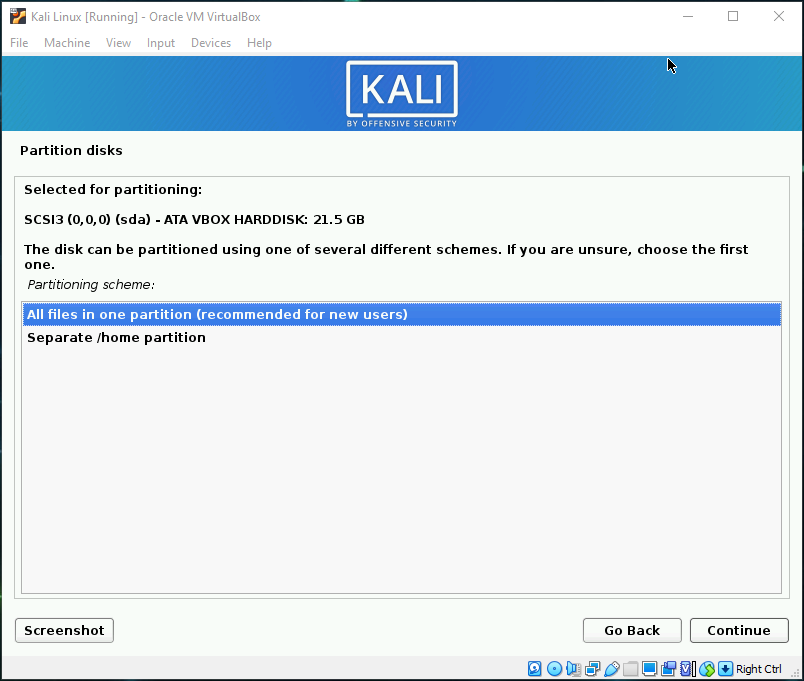
And we also want to click continue for the next screen too.
Now we want to choose Finish partitioning and write changes to disk and click continue.
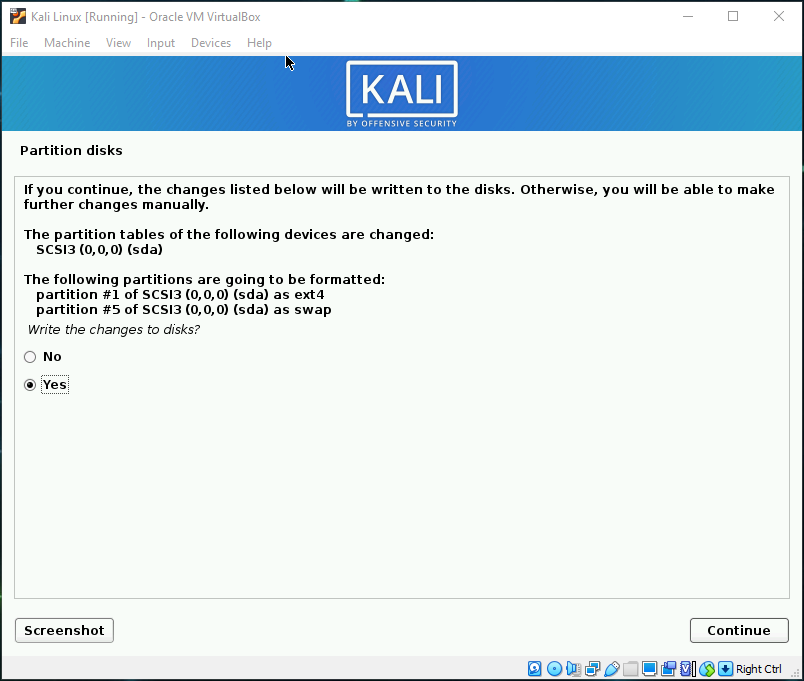
Choosing the yes option on the next screen to confirm that this is what we want to do and then the continue button.
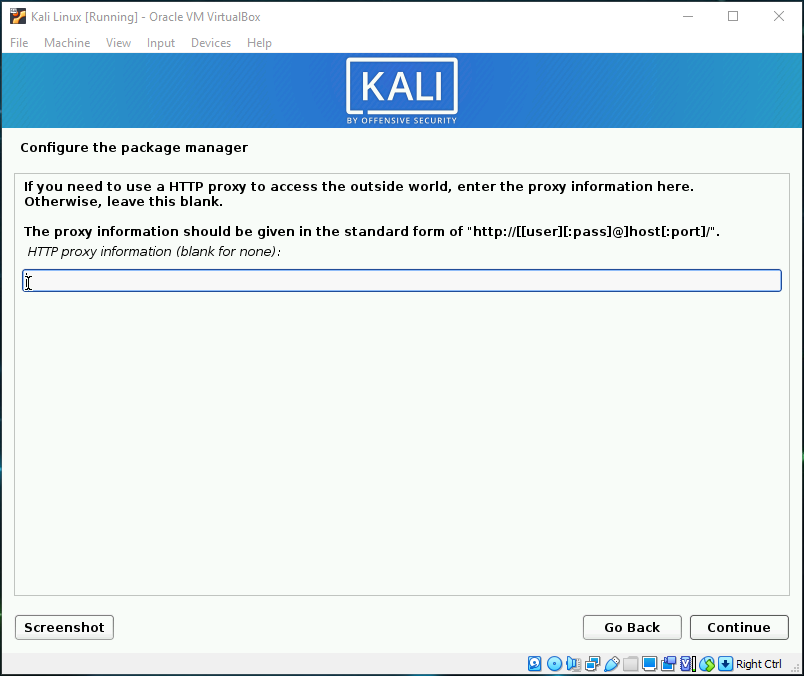
The next step will take some time to install as it’s extracting files from the iso file and writing them to the disk. Now would be a good time to pause for a bit, stretch and maybe get some water while we wait for it to finish installing. Once the next screen has shown up, we are given options to enter a proxy for a package manager. We can leave this blank and click continue.
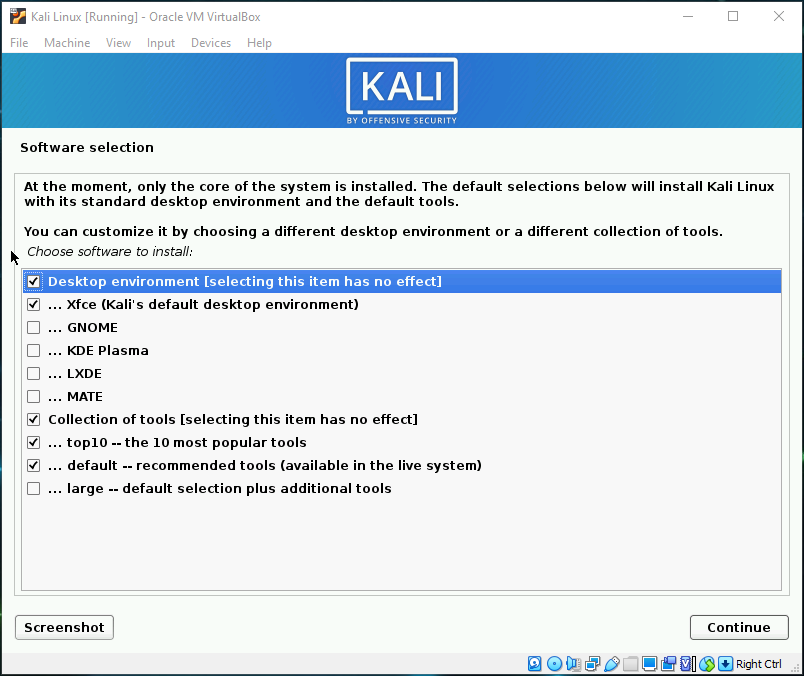
It will then take a second before starting to download and update files on the virtual machine. Once that is done, it will now ask us to download and install some additional files. We will just be leaving what’s already ticked as default and click continue again. This is another stage of the install process that will take some time as it downloads and installs the tools and desktop environment.
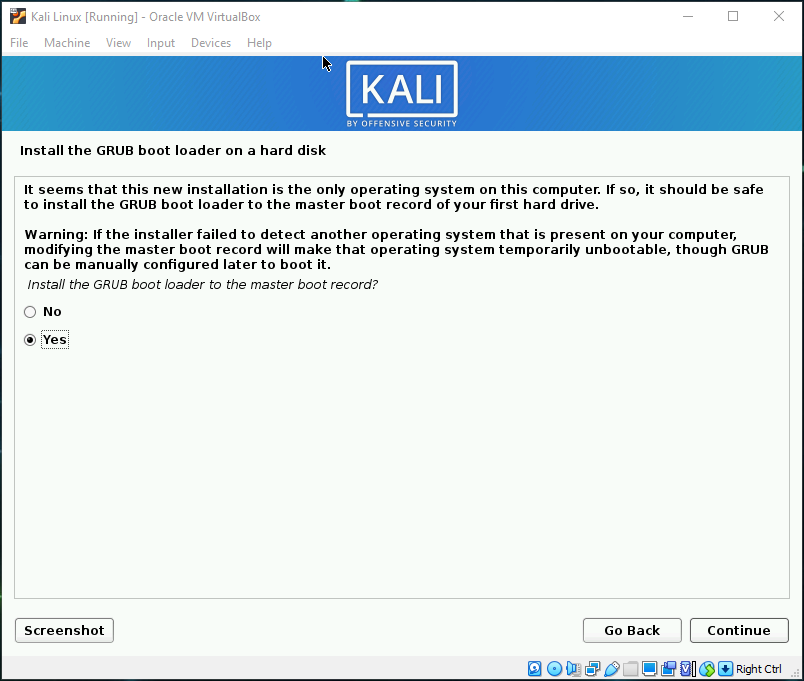
When the next screen loads up called GRUB boot loader, we do want to install it as the master boot record. So click continue.
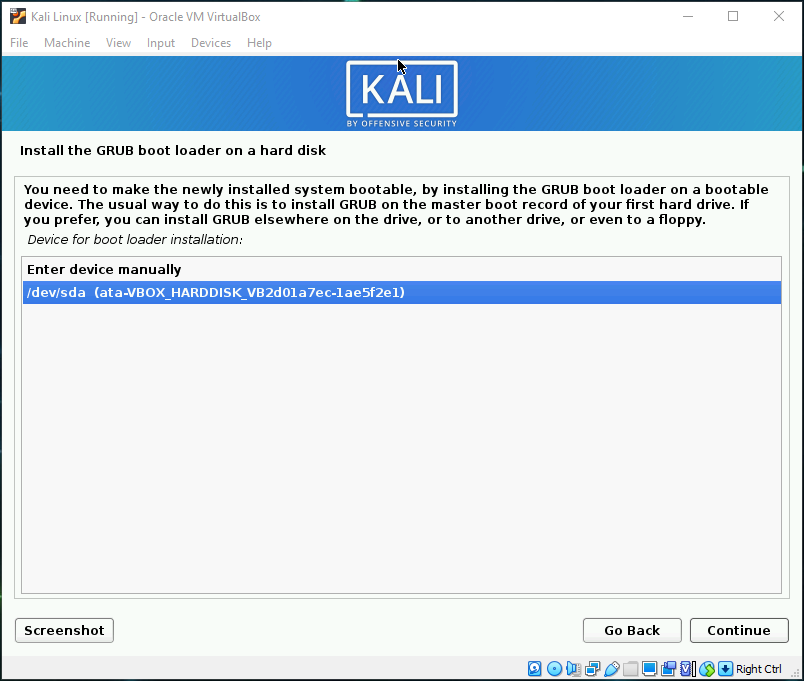
The device to install GRUB boot loader on will be the one we just partitioned with the filename as /dev/sda. So choose it and click continue.
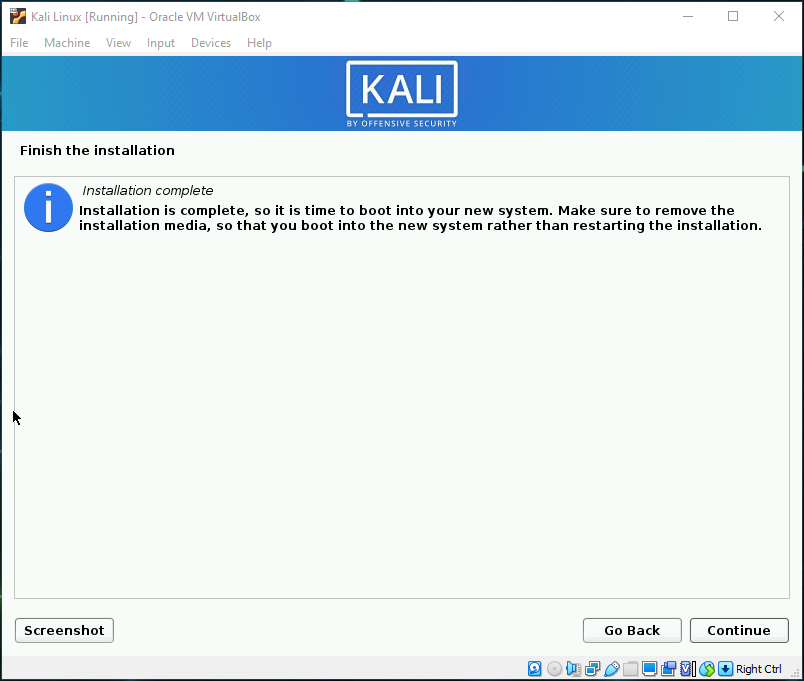
Now that the installation is finished, we can click continue and the system will reboot with Kali Linux fully installed as a virtual machine.

Summary.
I have now just demonstrated 3 ways of installing virtual machines in VirtualBox which covers how to install 99% of them. Now all’s left to do is start hacking, have fun. ![]()